Apps
Run Apps on Iagon Compute
Introducing Iagon Compute, a platform tailored to support applications deployed by compute subscribers on the Iagon decentralized compute network. Currently, our platform specifically allows hosting of NodeJS applications.
Apps that can currently be run on Iagon Compute:
- Node.js (LTS 16, 18, and 20)
More application support coming soon...
Requirements for Running dApps
- Must be an Iagon app user
- The app must have a public Git repository
- You should specify the port your app will be listening on.
Usually, you can find this information in the index.js file of your application, resembling:app.listen(3000, '0.0.0.0', function ()
INFO
Here, '3000' represents the port number, and '0.0.0.0' is the host ip.
Please input the same values from your code into the form.
- The app should include build and start commands in the package.json file.
Build command:npm run (build command you provided) (leave blank if no build is required)
Start command:npm run (start command you provided)
Please ensure your code resembles the following structure in your package.json:
{
  "scripts": {
    "start": "node index.js"
  }
}- You should provide any environment variables used by the app
Technical Details
- Each App runs inside its own isolated environment. Isolation is achieved by creating a new VM for each app using the KVM hypervisor.
How to run Apps
To run an app, navigate to app.iagon.com and go to the Apps section. In the "Apps" menu, click "Apps", then the "Add App +" button to deploy your app to the Iagon Compute network. Upon deployment, you will receive a domain URL for your app.
Additional Instructions
Follow these steps for deploying your App with screenshots for guidance:
Click Apps, view Apps
- Click on Apps, Apps menu should be displayed
INFO
If we haven't subscribed to storage, we can only view the Apps hosting option.
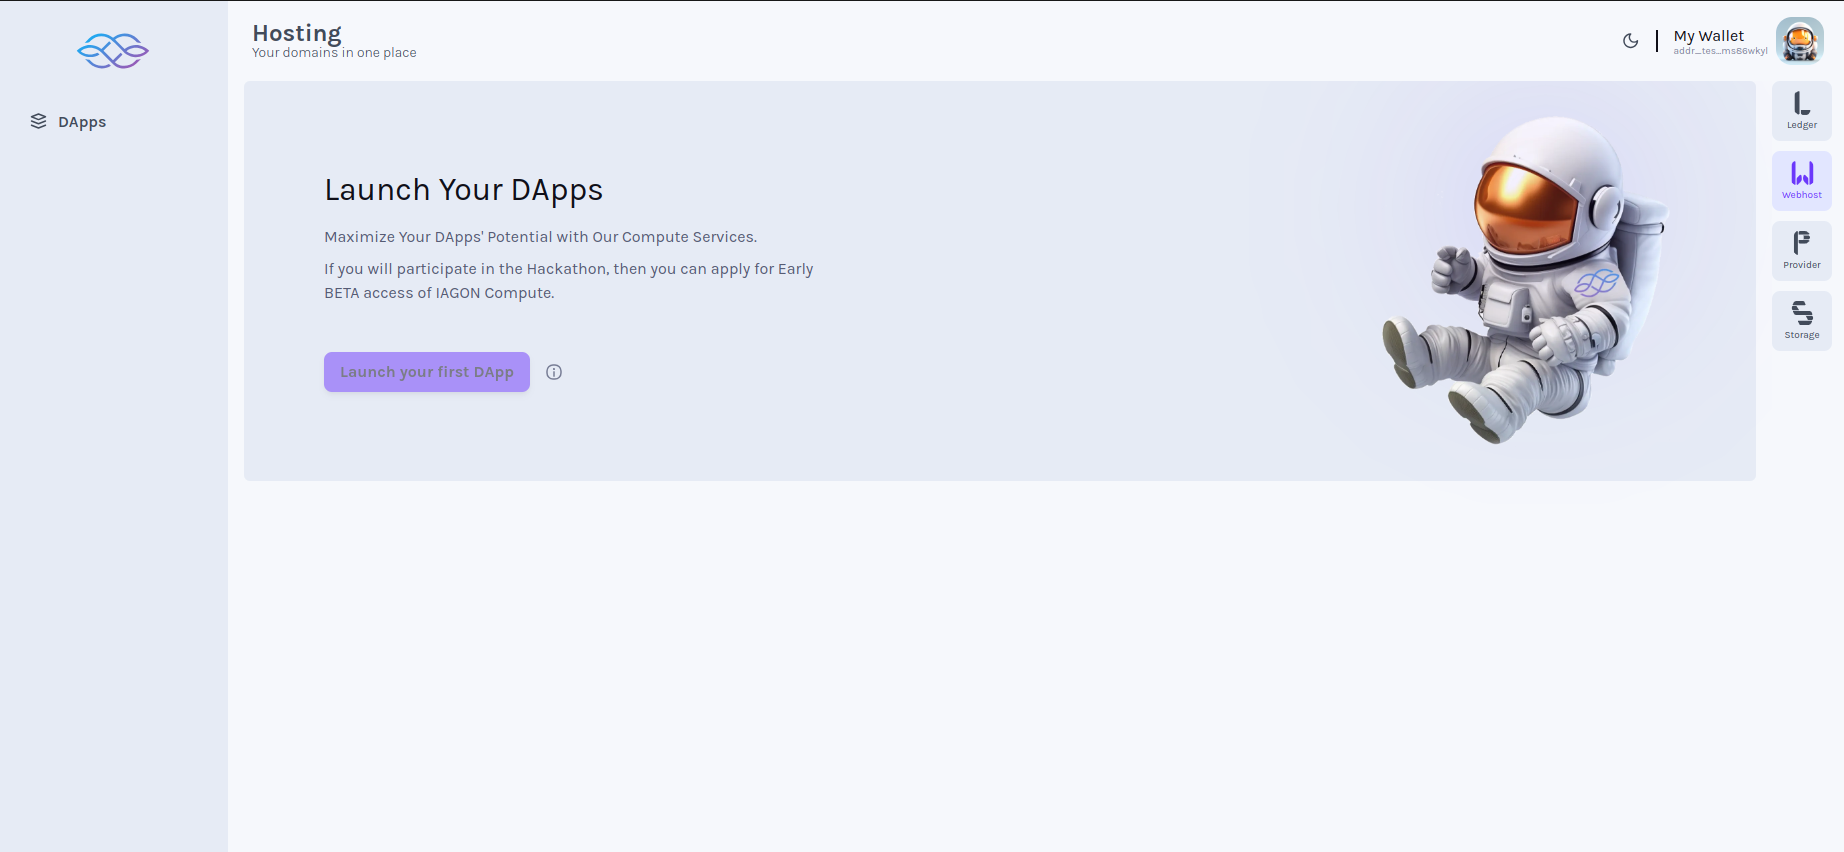
Click Apps (Launch page if no App)
- Click on Apps menu (Launch page should be displayed if App has not been added yet)
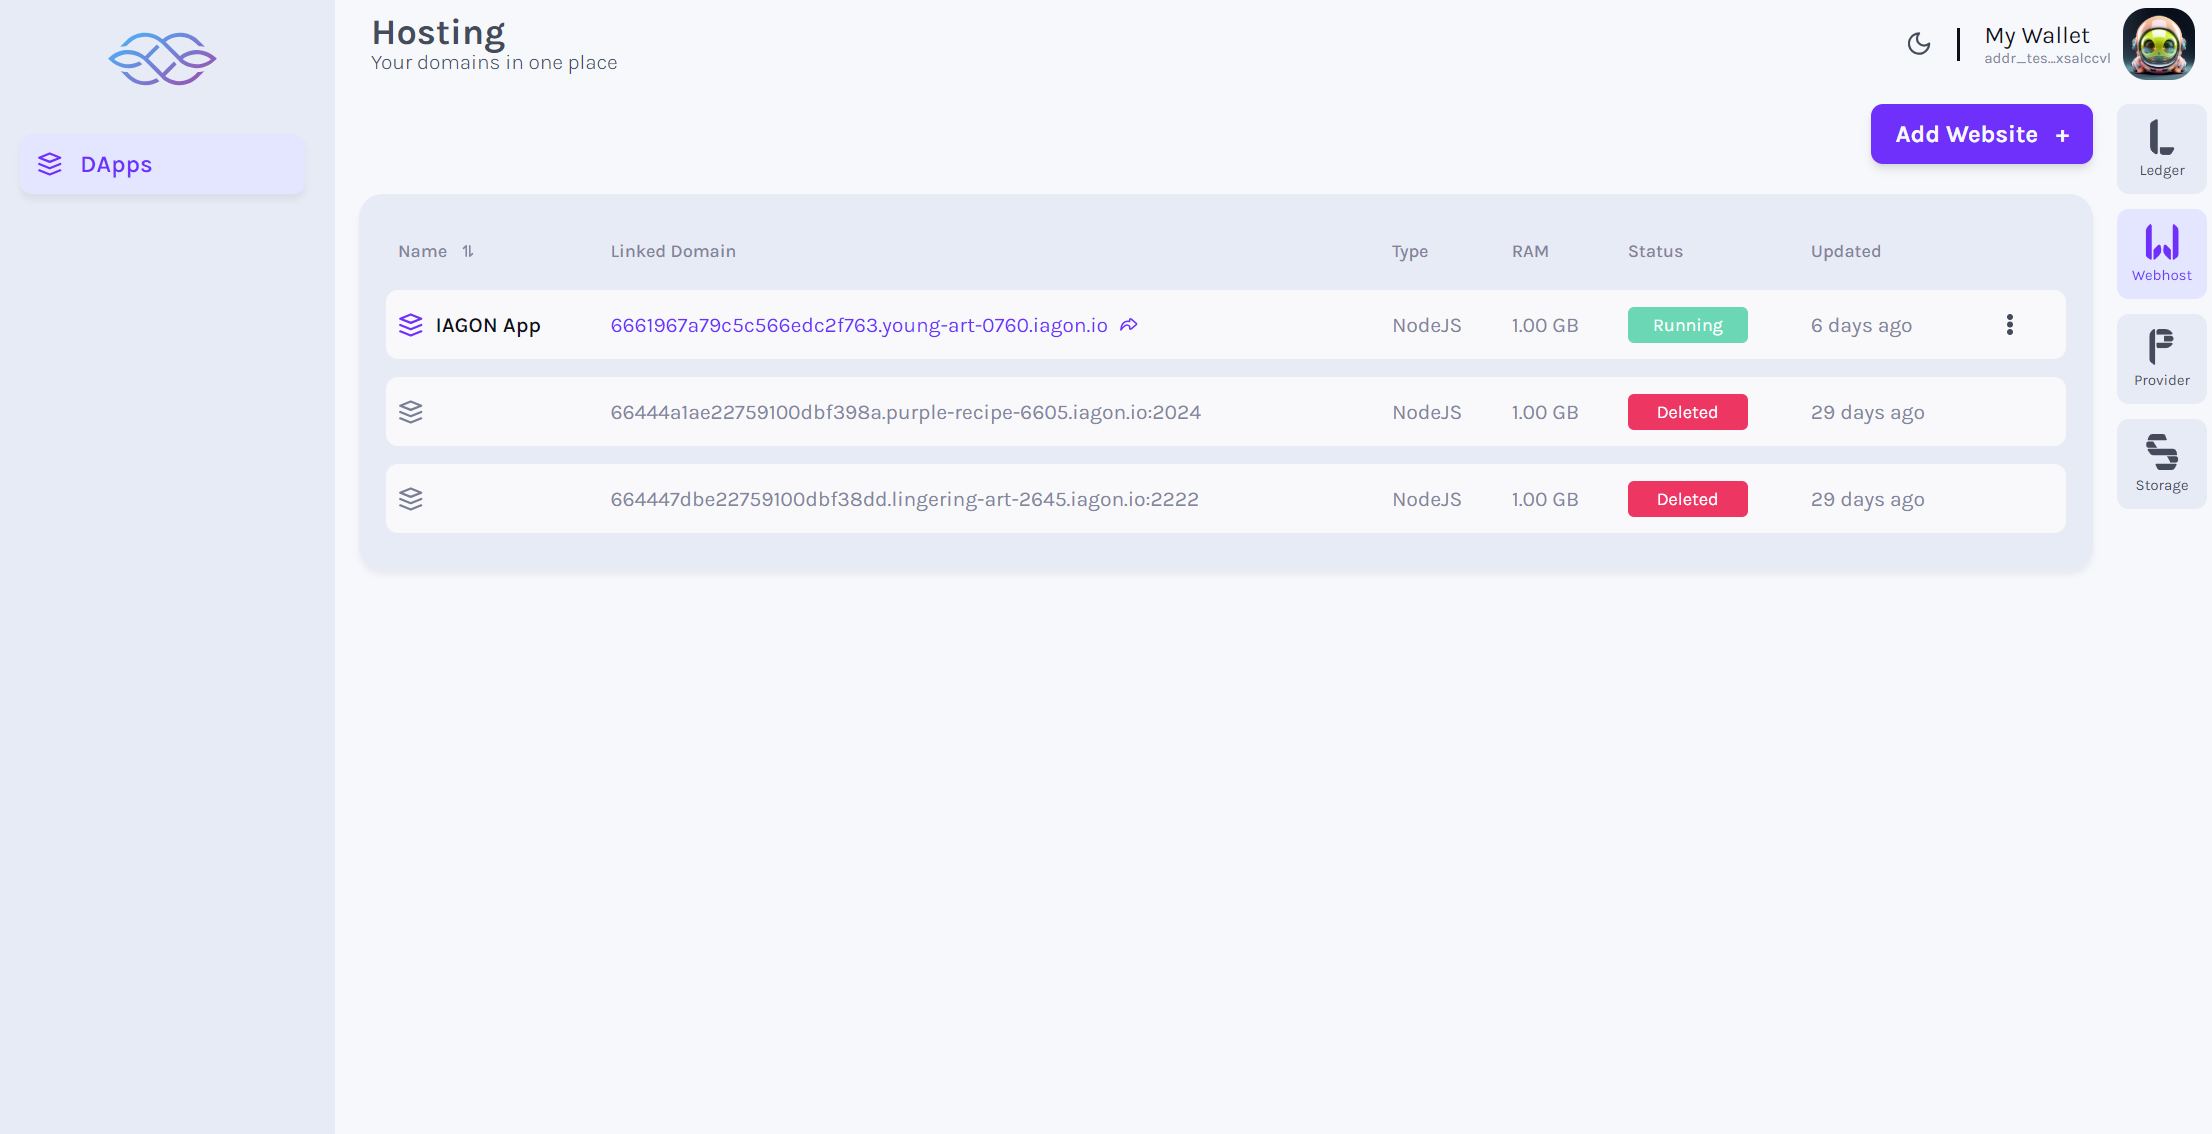
Click Run App (List of Apps)
- Click on Apps menu (List of added App should be displayed with its proper data and status with button to add App)

Click Add App (Clear node status)
- Click on the Add Website button (All the nodes status should be deleted before adding new one)
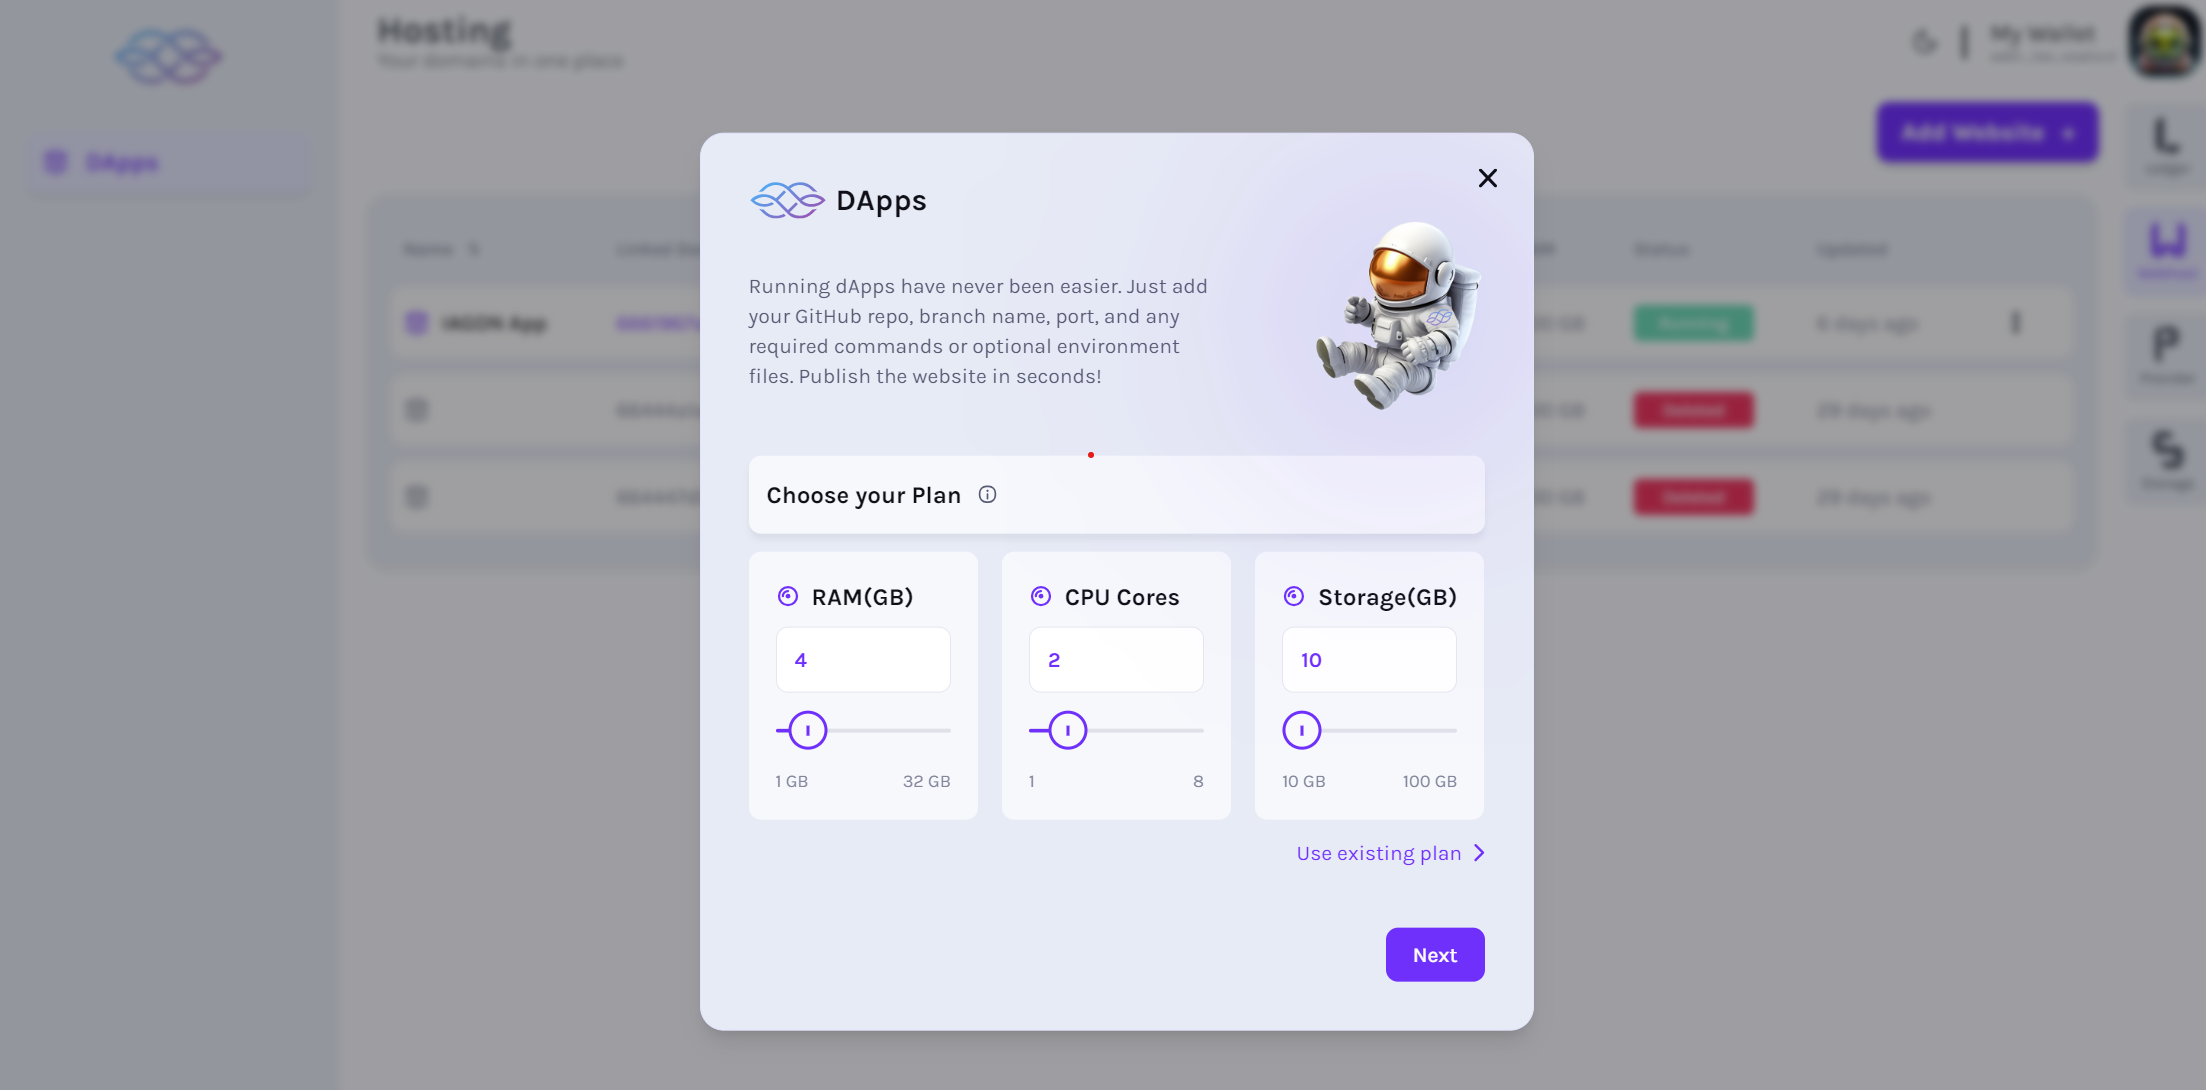
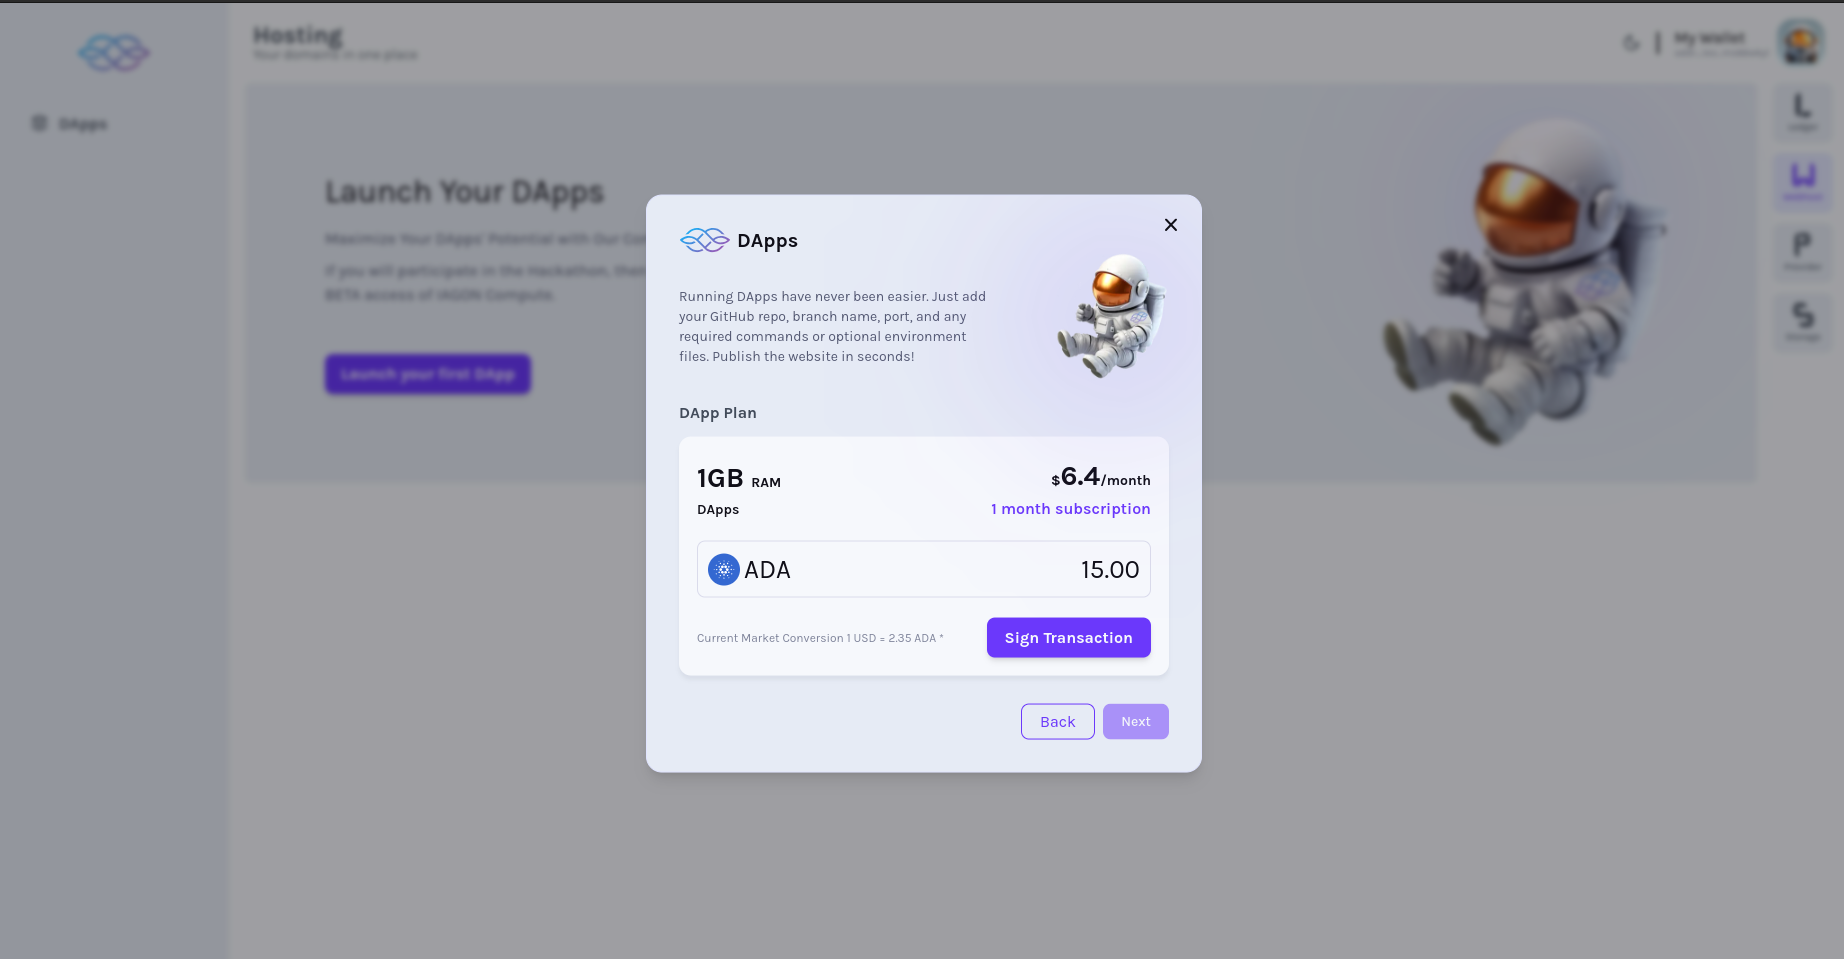
Choose subscription plan
- Form should be displayed to enter details to choose subscription plan
Subscription payment
- Sign the transaction to pay for the subscription.
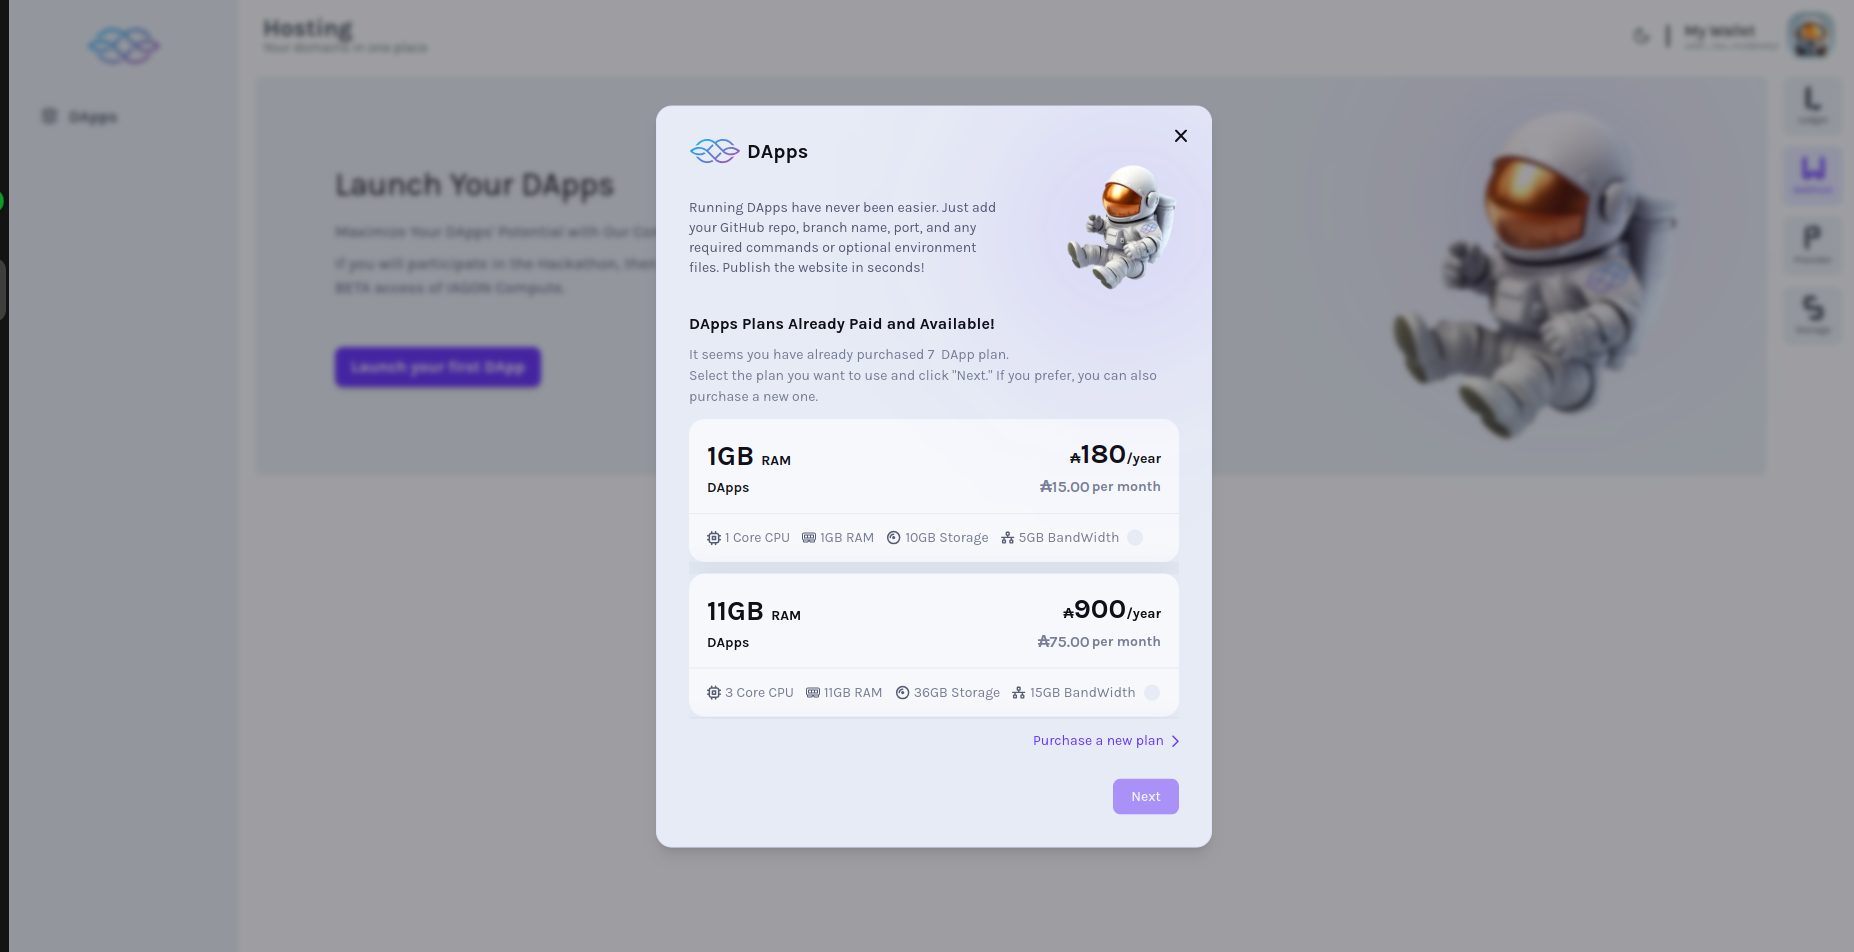
Choose paid available plans
- Choose from the available paid plans to host your App.
Enter app details
- Form should be displayed to enter details of the App

Fill required fields
- Enter valid data in all the required fields as per necessity. For reference, please refer to requirements

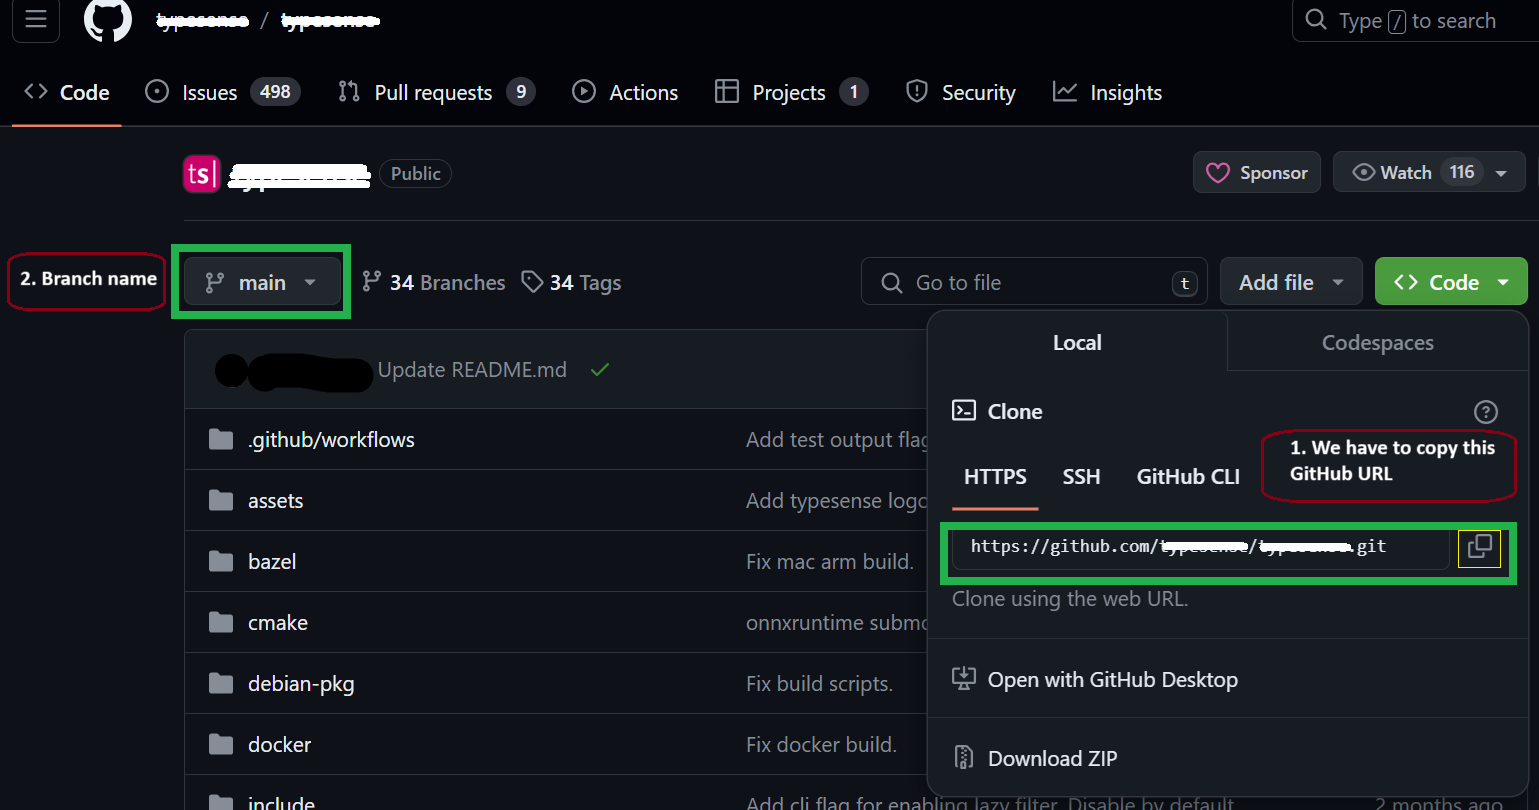
- For the GitHub link, please navigate to your repository's code page. Locate the "Code" button, which may be accompanied by a dropdown menu, as shown in the screenshot. Copy the GitHub repository link from there.
INFO
Please refrain from copying the URL shown in the browser's address bar.
Paste the copied GitHub repository link into the form.
Regarding the branch
Referencing the screenshot, identify the name of the branch you are currently working on. This branch name should be added to the form accordingly. If it is the default branch, please include its name in the form.
Click Next
- Click on the Next button after entering valid data in all required field
View deployment page
- Another page should be displayed indicating app is being deployed
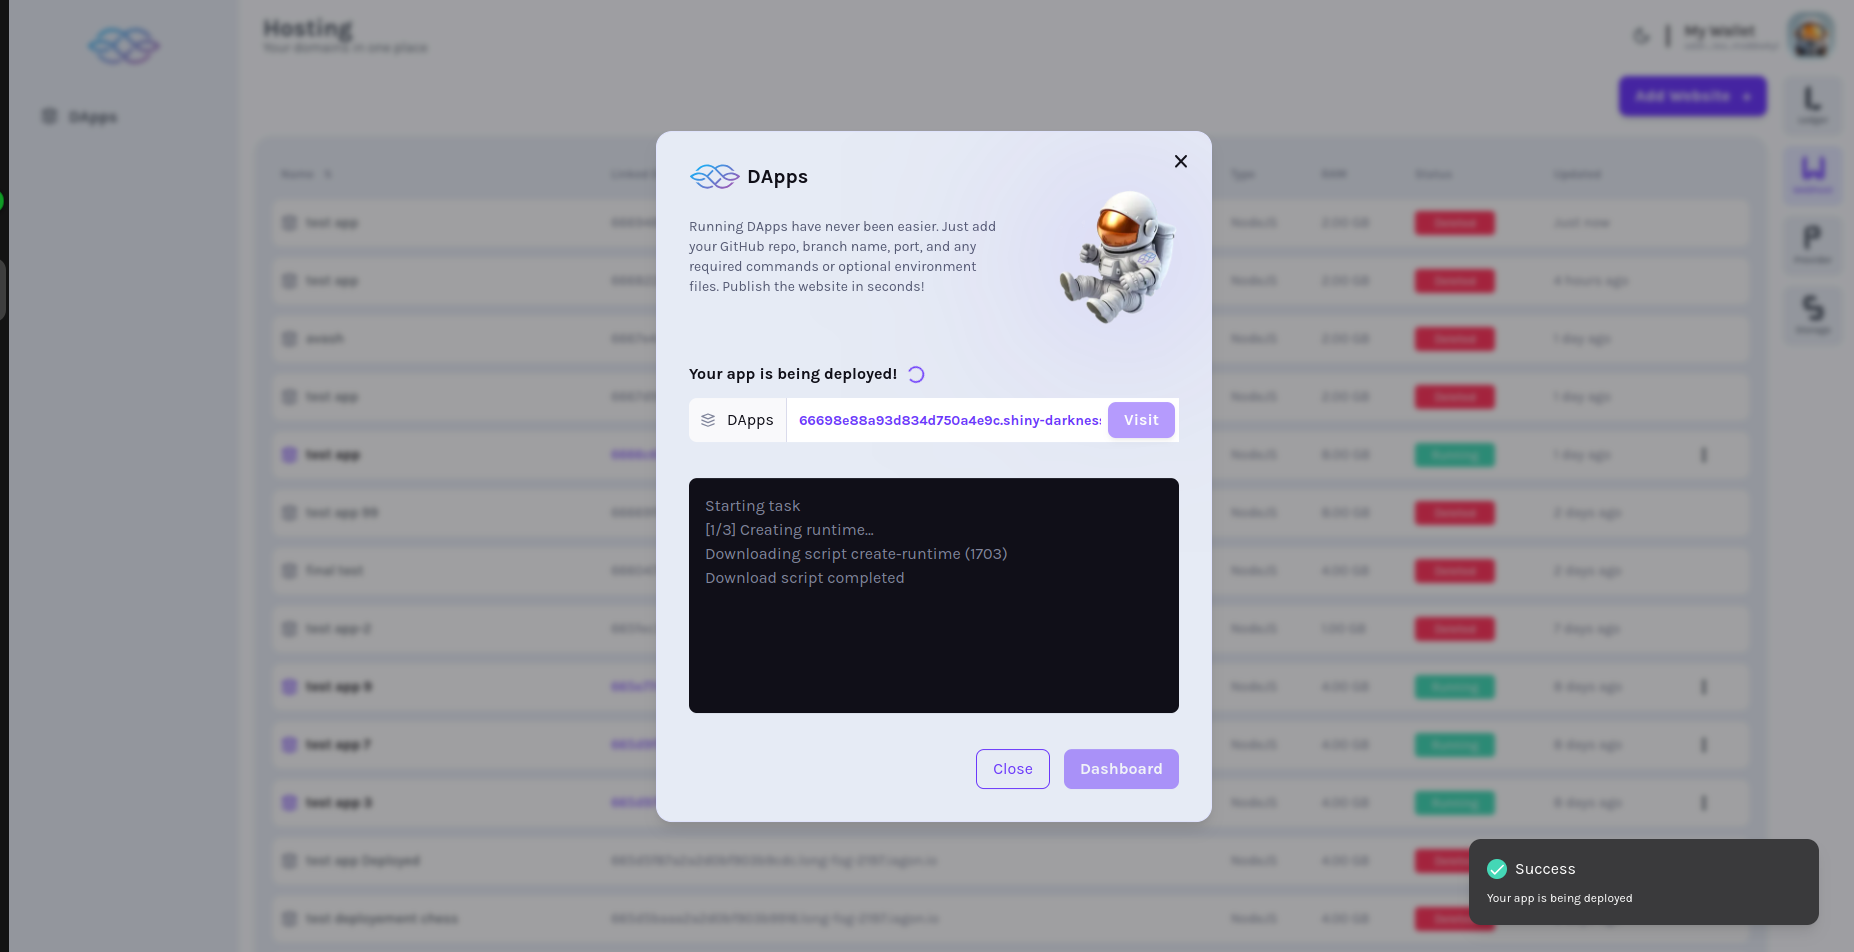
Visit button enabled
- Visit button should be enabled after deployed is completed
App list shows "Running"
- After added, app list should be displayed at top with "Running" status
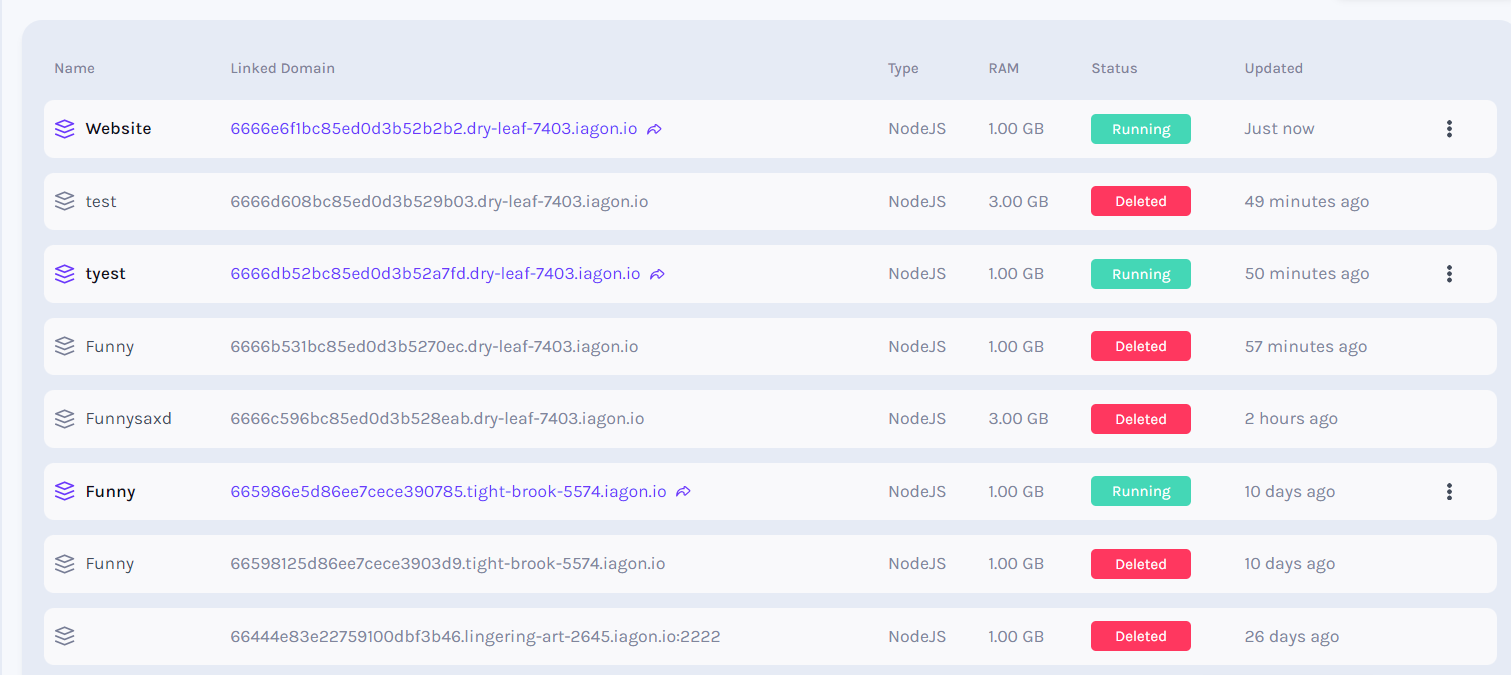
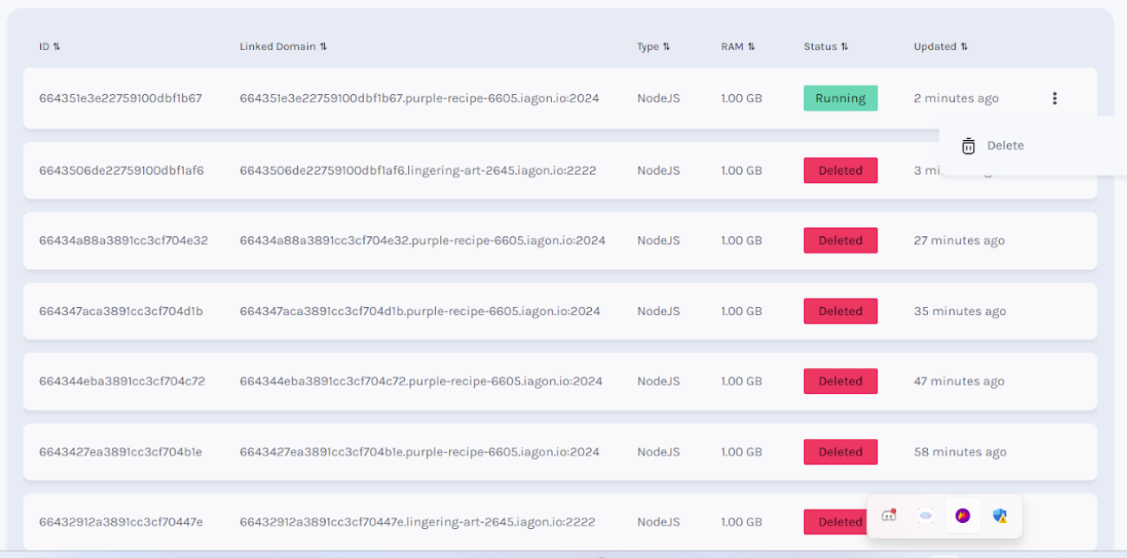
Delete App (Click three dots)
- After adding the app, we can delete it. Click on 3 dot button on the web
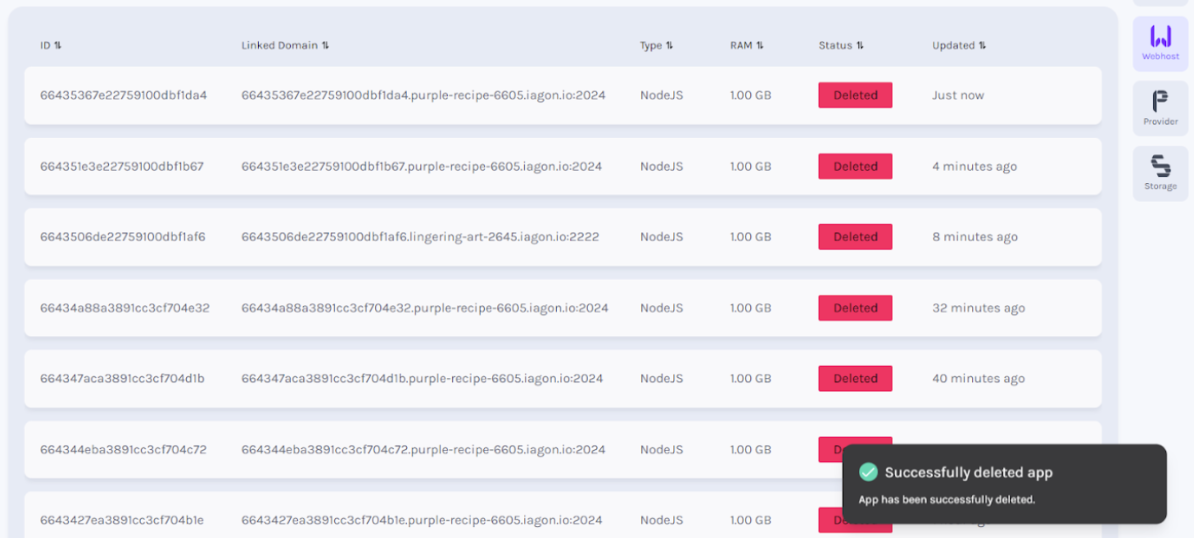
View delete success message
- Successfully deleted message to be displayed
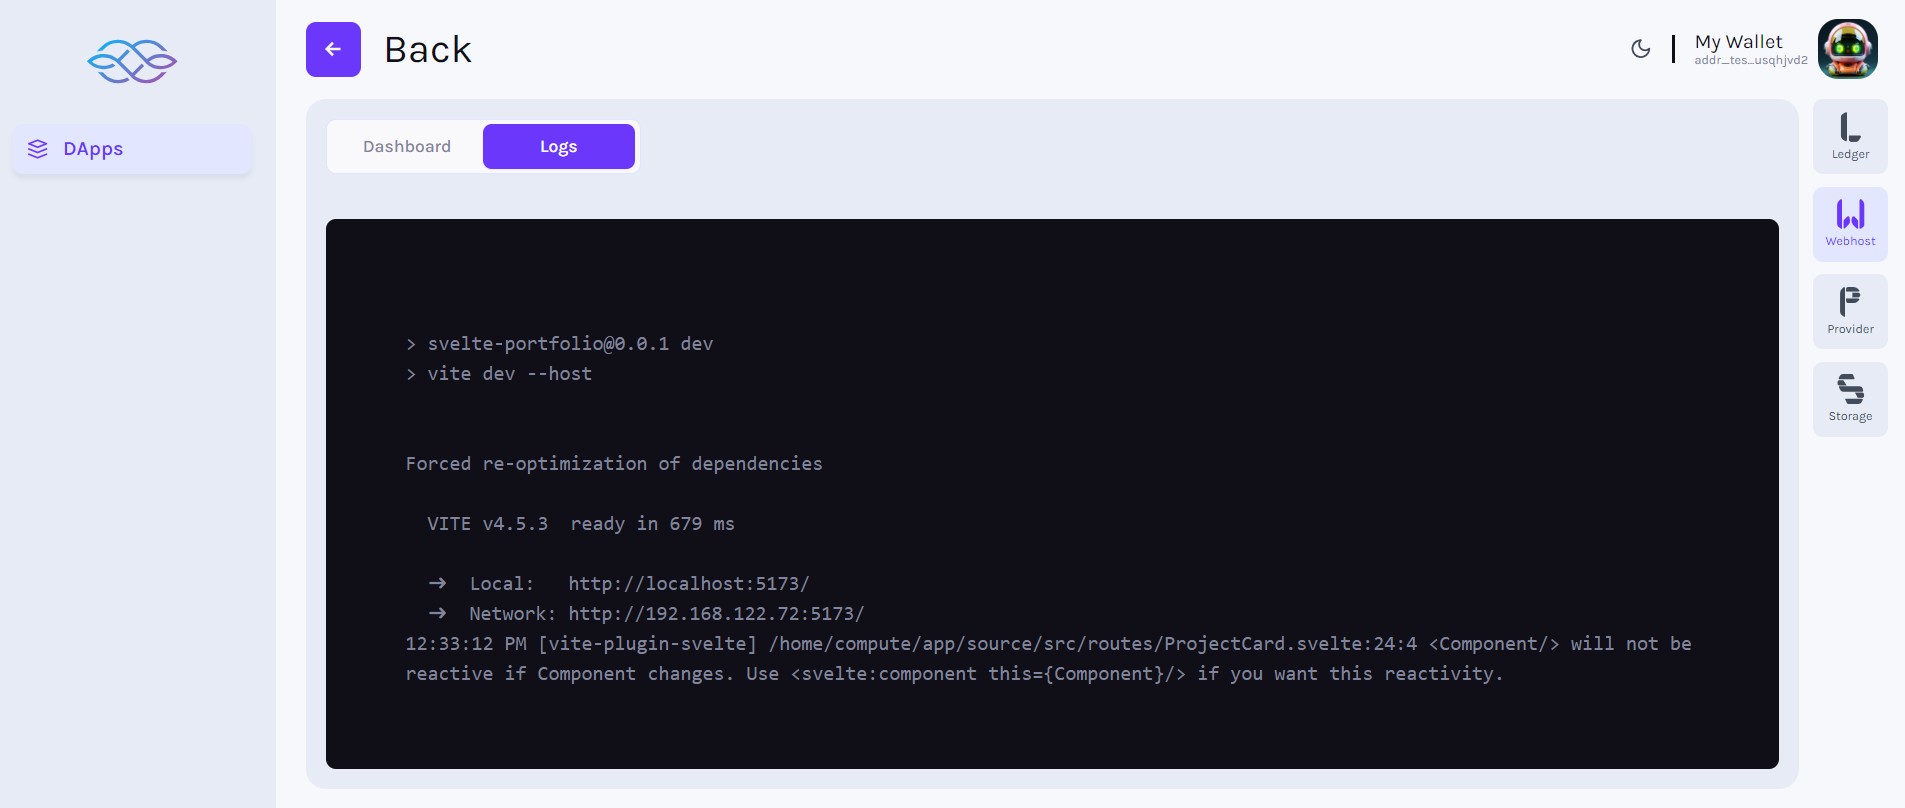
View Apps Dashboard
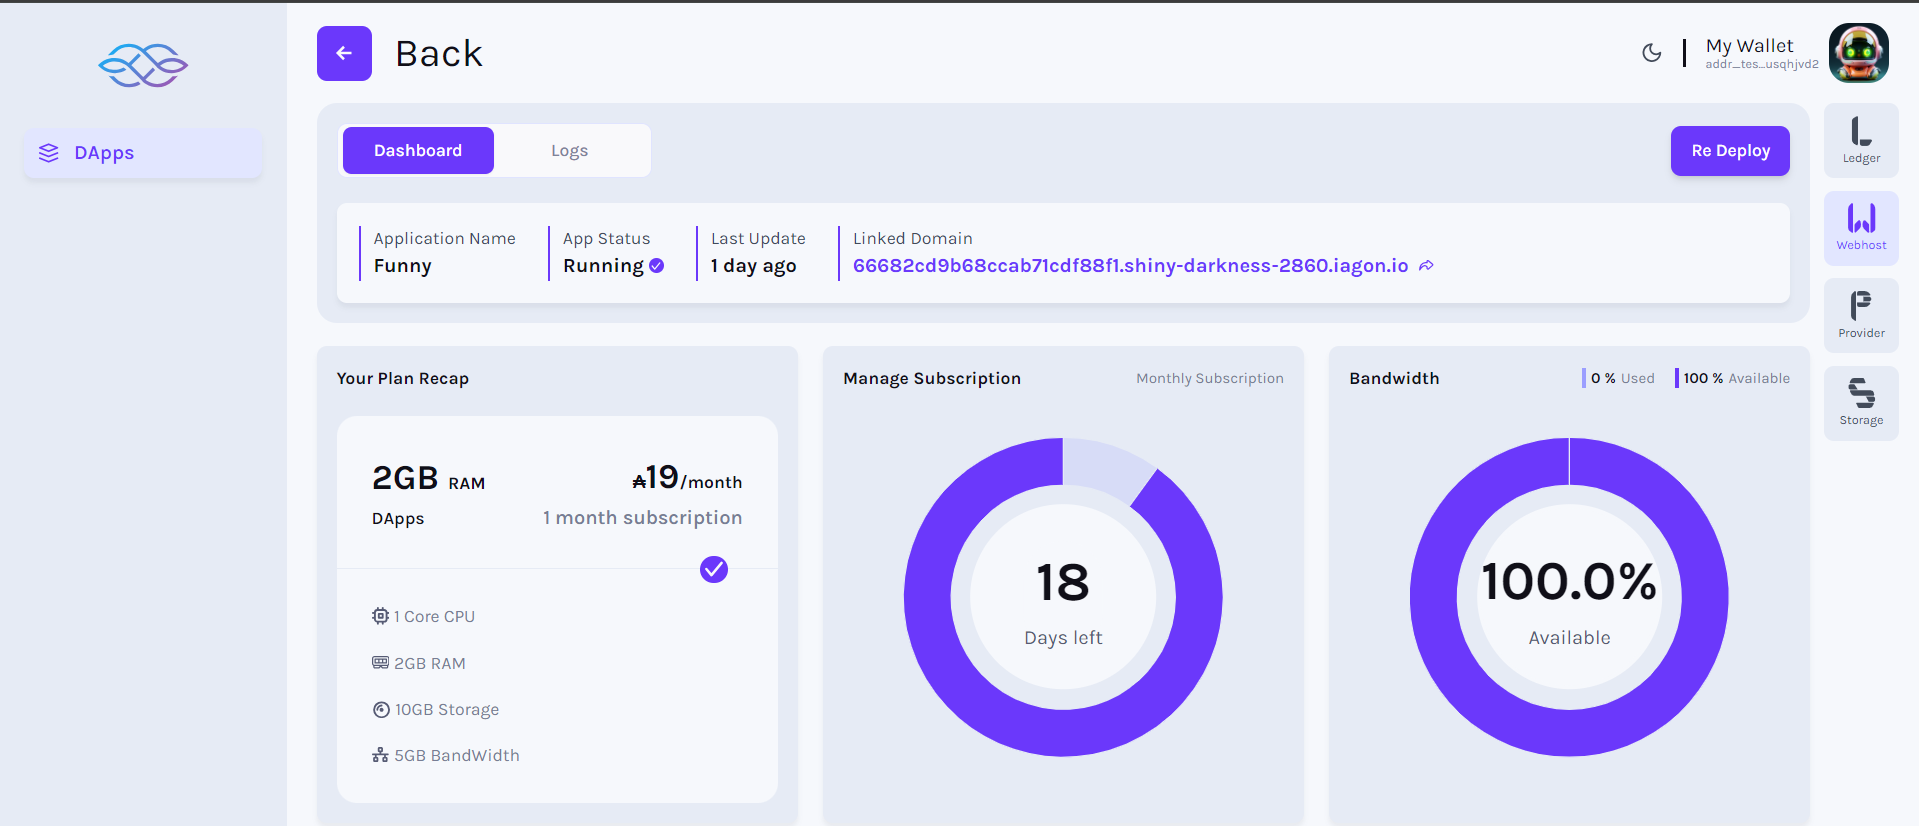
View Apps Log