Storage Node
Command-Line Interface Setup
Overview
How to interact with CLI
The Command-Line Interface (CLI) allows users to interact with a system or application by issuing text-based commands. This interaction enables users to execute specific tasks, view system information, or modify settings, with the system providing feedback in the form of text-based responses.
To use CLI, open Terminal (Linux/Mac) or Command Prompt (Windows) and paste in the commands from the instructions on this page.
System Requirements
Minimum System Requirements:
- Storage Capacity: 900 GB
- Upload Speed: 20 Mbps or 2.5 MB/s
- Download Speed: 20 Mbps or 2.5 MB/s
- Read Speed: 20 Mbps or 2.5 MB/s
- Write Speed: 20 Mbps or 2.5 MB/s
- Uptime Percent: 90%
IAG Stake Required
Following the setup of your device as a node, the network requires storage providers to demonstrate their commitment to the network and stake a balance of IAG tokens that is proportionate to the storage they wish to provide. The number of tokens required is dynamic and changes based on the current value of IAG tokens and how much storage a user wishes to provide. The calculation is as follows:
Current Base USD Staked per GB: 0.5
Initially set at $0.5 per gigabyte (GB) committed. Represents the minimum staking requirement in USD for each GB of storage.
Current Alpha Coefficient: 0.9
Determines how sensitive the staking requirement is to the IAG token price. Subject to adjustment based on market research.
Formula:
IAG to be staked = Storage (in GBs) * (Base USD Staked per GB + Alpha * (Base USD Staked per GB / IAG Value))INFO
IAG stake cannot be withdrawn until the node is retired and a 3 month retirement period has passed.
Node Installation and Setup
1. Download and Install The Node
In the directory you'd like to store the node application in, run this command to download and install it:
curl -fsSL https://skywalker.luke.iagon.com/iagon-node/linux/install | sudo bashcurl -fsSL https://skywalker.luke.iagon.com/iagon-node/macos/install | sudo bashComing soon...2. Register The Node
Choose your approach depending on whether you're converting an existing legacy node on the same server; migrating a node from another server; or setting up a new node:
WARNING
Before starting the new node application, make sure the legacy node application is no longer running. Do not forget to disable any services or scheduled scripts that would auto-start the old node application. It is recommended to completely remove the old node application from the server.
Run the following command and accept the prompt to convert your existing legacy node's config and continue running that node on the same server. The original config will be copied and converted for use by the new node, and the same storage directory will be used:
iagon-node registeriagon-node registerComing soon...TIP
If an existing config is not in the default location, use the --data-dir flag to specify its directory. Example: iagon-node register --data-dir /configs/iagon-node/
3. Set Up System Service (Optional)
Add the node as a system service for automatic startup on system boot (highly recommended if the system supports it):
sudo iagon-node service install && sudo iagon-node service startsudo iagon-node service installComing soon...The node service will be started.
4. Start The Node (Skip if step 3 was completed)
This runs the node in the foreground, meaning it stays attached to your current terminal, and log output appears in that session. Closing the terminal or interrupting the process (for example with Ctrl+C) would then stop the node. To run the node in the background, use the system service from step 3 when you can. If you are unable to use system services, other usual approaches are tmux or screen, nohup or disown, or any process manager that keeps the session alive outside a single interactive shell - this page does not document those setups as they are up to your preference as a systems administrator.
WARNING
Only run this command if you did not complete step 3!
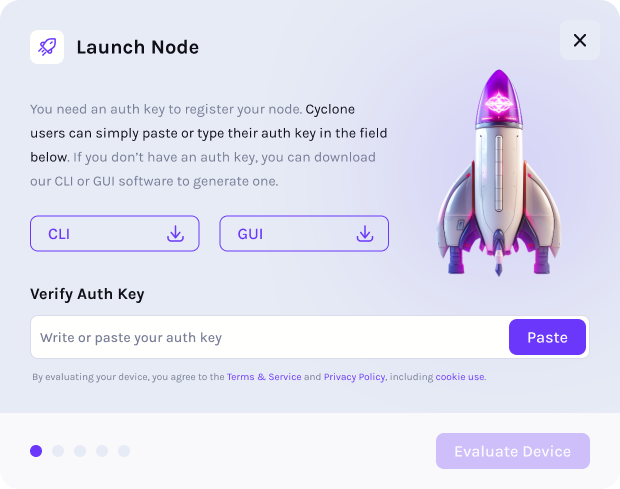
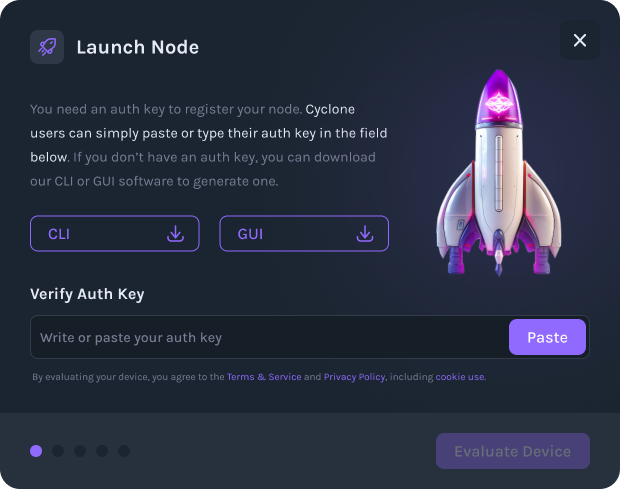
iagon-node startiagon-node startComing soon...Node Registration (New Node Only)
Visit https://dashboard.iagon.com/node on your mobile Cardano wallet’s dapp browser, or your desktop web browser that has a Cardano wallet browser extension set up, and log in with your wallet
Select

Follow the on-screen prompts to input your auth key and evaluate your device
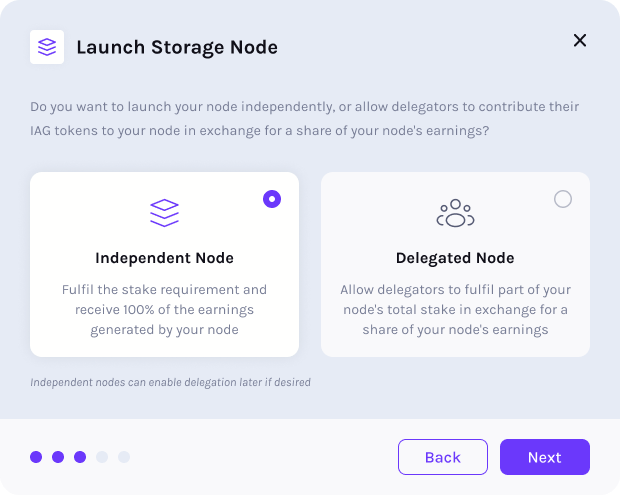
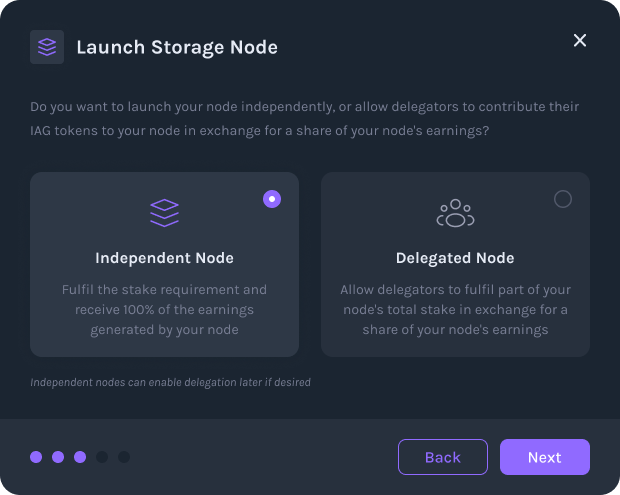
- You will need to decide if you want to run this node as an independent node or a delegated node. An independent node will be staked only by you, and you will keep all of the node’s earnings. A delegated node will be staked partially by you (at least the minimum requirement) and partially by other IAG token holders, with whom you will share the node’s earnings with. If you have any questions about these differences, please reach out to our team or refer to the Staking Platform documentation
- Continue to follow on-screen prompts to set any further node parameters and to stake your IAG tokens
TIP
You may resize your node's commitment and stake more IAG any time.
Full Command list
start Start the node in the foreground (current terminal session):
iagon-node startservice Manage the service:
iagon-node service

# Usage: iagon-node service [OPTIONS] <COMMAND>

#  Commands:
#  start      Start the service
#  stop       Stop the service
#  restart    Restart the service
#  status     Check service status
#  install    Install as an OS service
#  uninstall  Uninstall the OS service
#  help       Print this message or the help of the given subcommand(s)
#  Options:
#  -l, --log <LEVEL>  Set the logging level [possible values: error, warn, info, debug, trace]
#  -h, --help         Print help
register Register the node in the Iagon network:
iagon-node register

# Optional flags:
# --auth-key <AUTH_KEY> to specify an existing node's auth key to migrate that node.
# --data-dir <DATA_DIR> to specify either the directory where an existing legacy config is stored; or where a new node should store its hosted data.
update Manually update the node to the latest version:
iagon-node updatemigrate Migrate configuration from a legacy node:
iagon-node migratebenchmark Run performance benchmarks:
iagon-node benchmarkinfo Check node info:
iagon-node infokey Manage node keys:
iagon-node keyreset Reset the node and clear data and configuration:
iagon-node resethelp Print command list or the help of the given subcommand(s):
iagon-node help