Cyclone Qs / Qs Pro
FAQ
How can I interact with my Cyclone Qs / Qs Pro?
- The Cyclone Qs / Qs Pro can be interacted with via a monitor plugged directly into the device, or remotely via the Cyclone's web interface which is hosted locally on your network.
- Use the DisplayPort or HDMI port on the back of the device to connect a monitor, and use the USB ports on the back of the device to connect a keyboard and mouse.
- To control your Cyclone remotely, access the web interface by visiting
http://cyclone.localin your web browser. - If you have multiple Cyclones, please make sure to physically distinguish each Cyclone by the order they were set up in.
Can I use CLI to deploy other applications/nodes on my Cyclone?
- Yes. You can access your Cyclone's CLI via SSH by running
ssh [email protected]on your personal computer's terminal. The password is the device password you set during setup. Your CLI interaction should feel like a typical Ubuntu server.
What is the difference between mirrored and pooled storage?
- Mirrored storage (RAID 1) is a type of storage that mirrors data across multiple drives. This means that if one drive fails, the data can be recovered from the other drives. Pooled storage (RAID 0) is a type of storage that combines multiple drives into a single logical unit. This means that the data is stored on all of the drives in the pool, and the data is distributed across the drives in the pool.
- Mirrored storage is a good option for users who want to protect their data from drive failure. Pooled storage is a good option for users who want to maximize their storage capacity.
What do I do if the Operating System installation gets stuck?
- Please shut down the Cyclone by holding down the power button, then unplug the power cable and leave it unplugged for 10 minutes. Then plug the power cable back in and power on the Cyclone. The Operating System installation should now complete successfully.
What do I do if the Auth Key is invalid when migrating from another node?
- Please start the node you're migrating from and regenerate the auth key from the Node Dashboard. You may then power the node you're migrating from back off and the newly generated auth key should work during Cyclone setup.
Maintenance
Change Storage Drives or NVMe Drives
Example cases include changing from HDD to SSD or to a larger HDD/SSD. When changing storage devices but not setting up a new node, please ensure that the new device has at least as much storage as the old device.
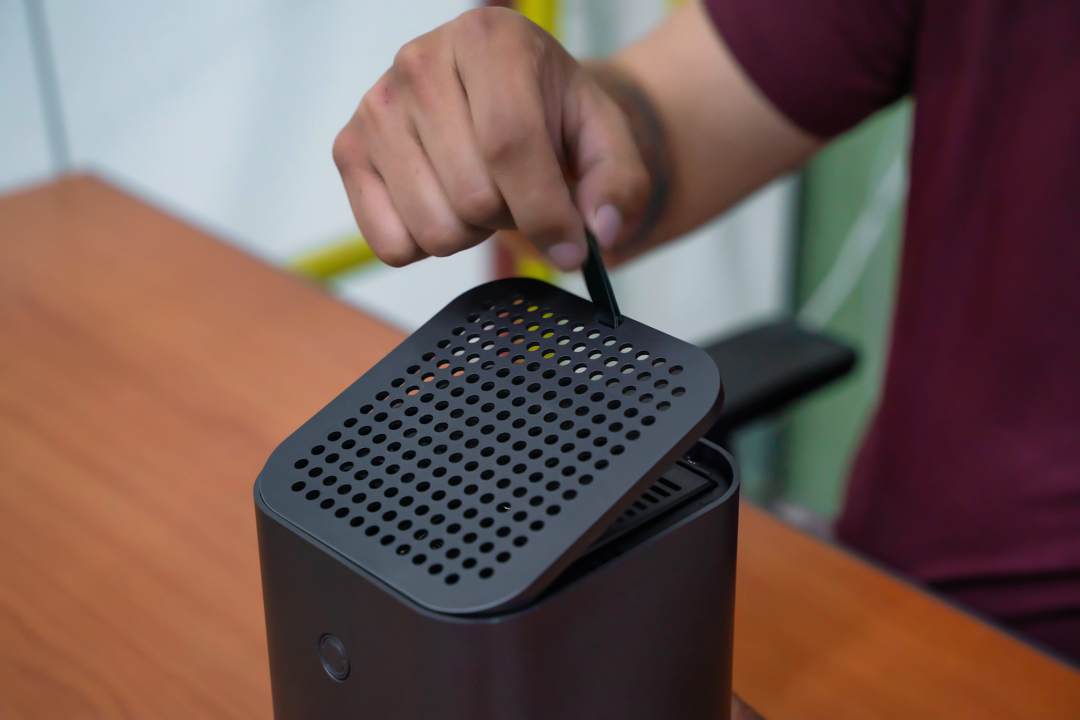
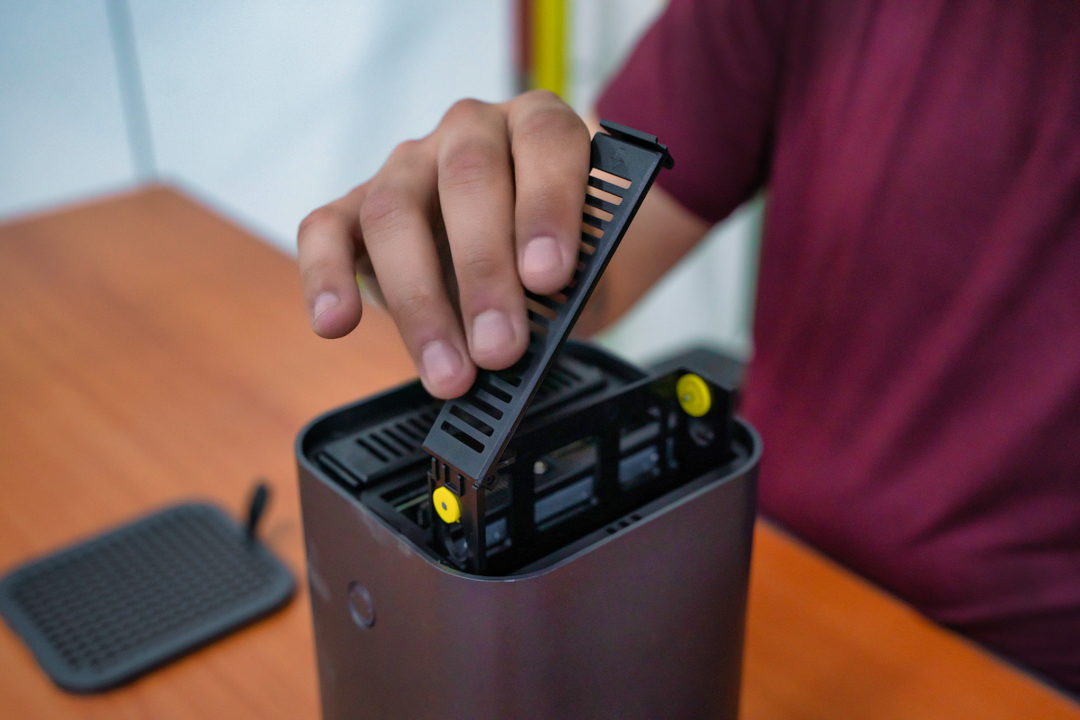
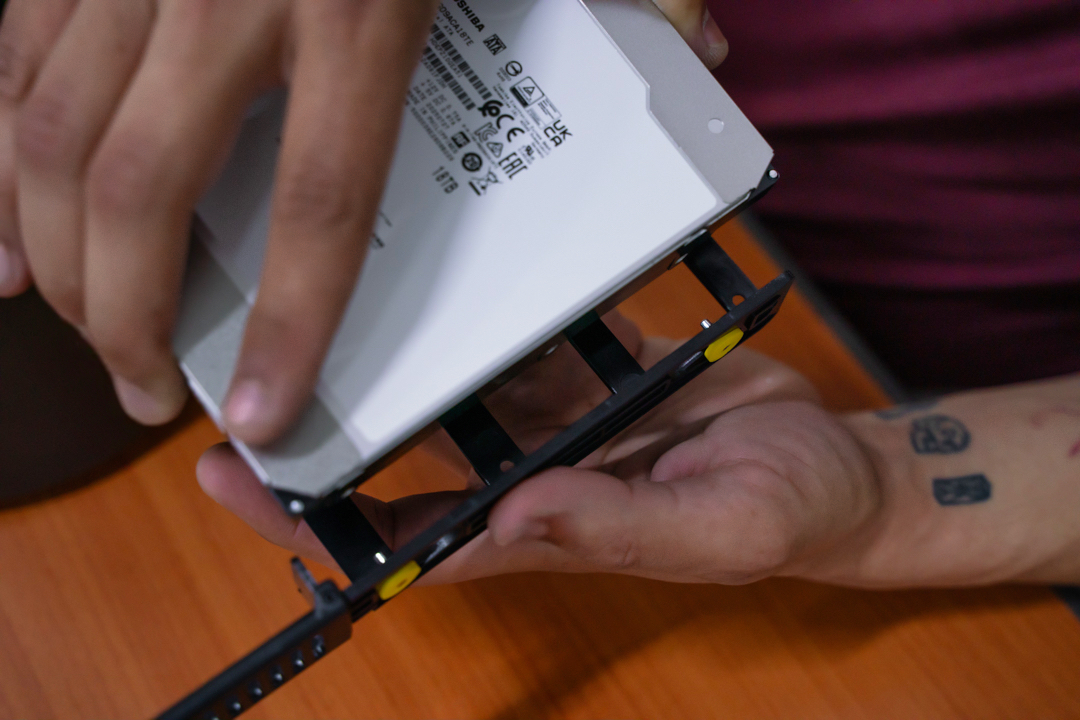
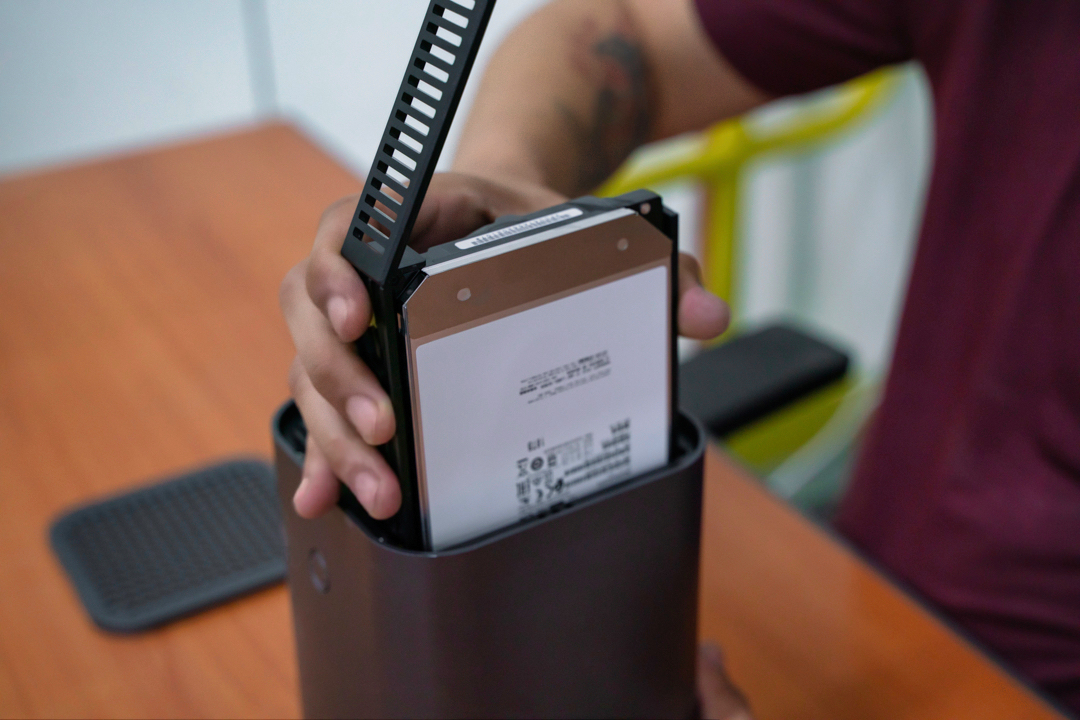
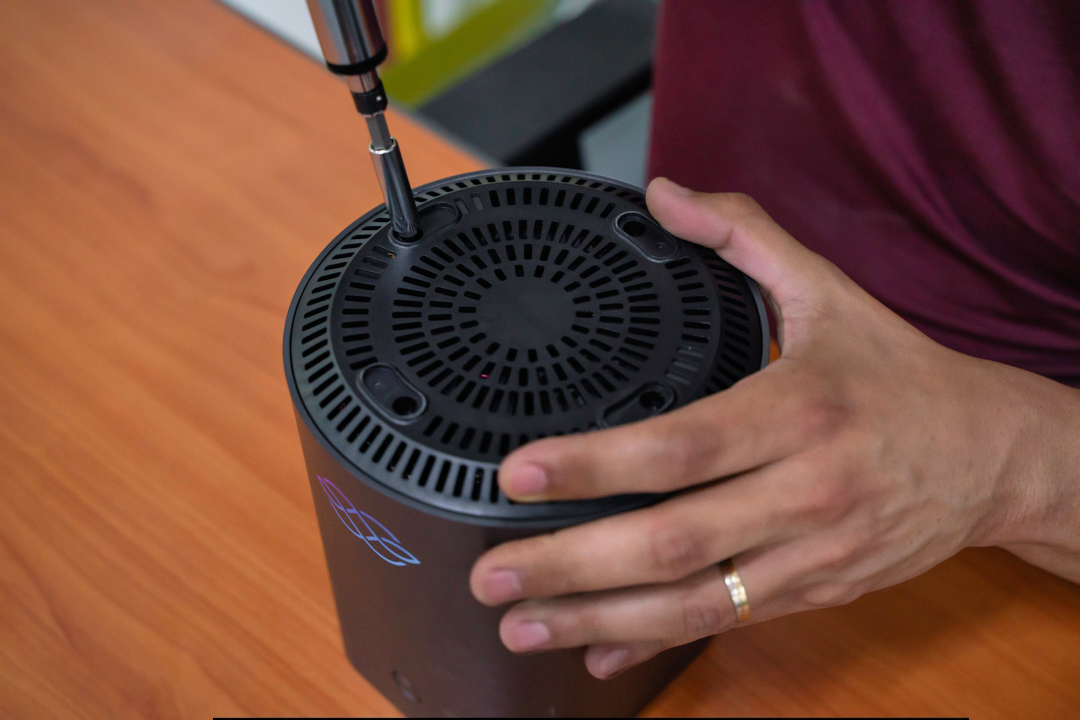
The steps to change the storage drives are as follows:
- Pull the tab to remove the top cover
- Remove both storage drive trays
- Remove the old drives and reinstall your new drives into the trays, aligning the screw holes in the side of the drives with the retaining pins of the tray. The SATA connector should face away from the hinge
- Slide the storage drive trays into their slots, ensuring the top of the drive faces outward. If you are only installing one storage drive, insert it into the slot on the left when looking at the front of the device
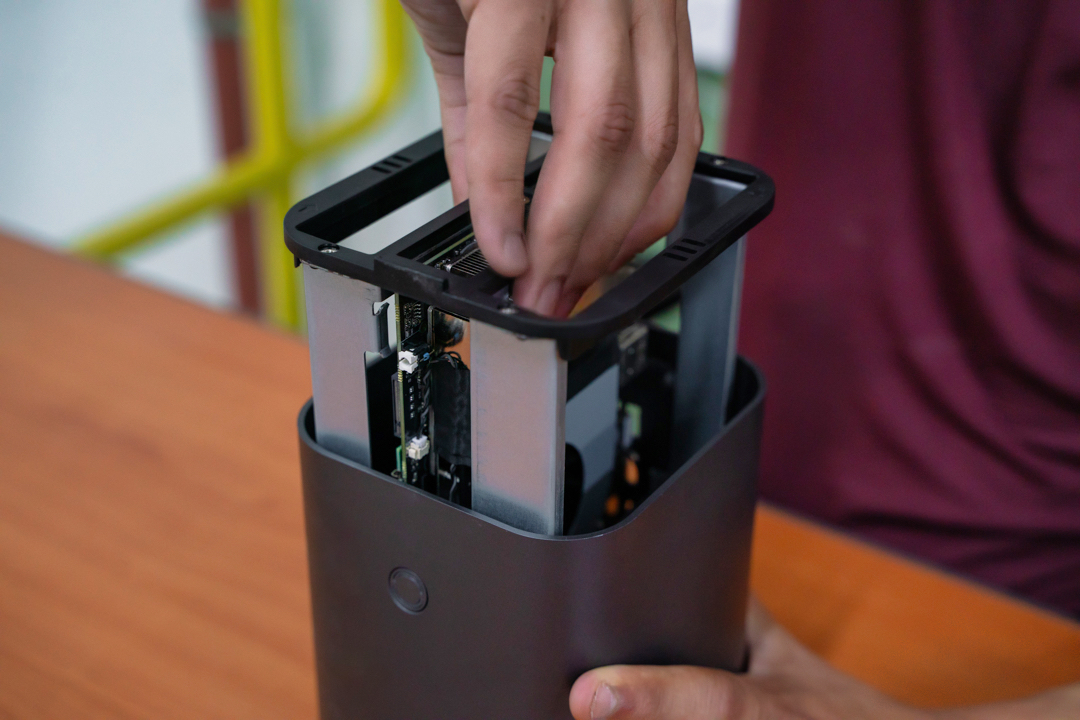
The steps to change the NVMe drives are as follows:
- Pull the tab to remove the top cover
- Remove both storage drive trays
- Unscrew the four screws on the bottom
- Pull the core out the top
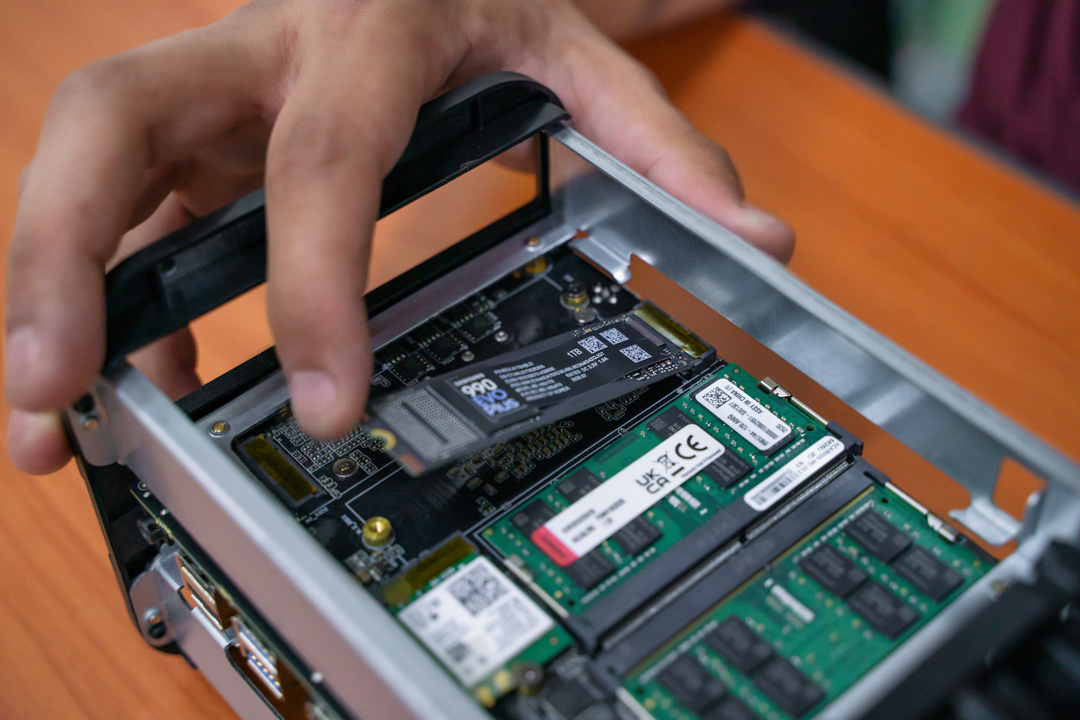
- M.2 NVMe drives can be changed by removing the retaining screw, carefully removing an old NVMe drive, inserting a new NVMe drive into the slot, and fastening it in place with the retaining screw
- Reinstall the core into the shell the same way it was removed, ensuring the rear IO ports align with their holes in the shell, then refasten the four screws on the bottom, reinstall the storage drive trays, and replace the top cover